Spreadsheets
1. Main characteristics of a table
A table consists of a set of cells arranged in columns and rows.
2. Creating A Table
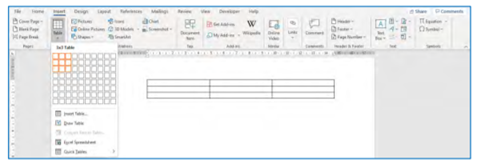
From the Insert tab and the Tables group we select the table icon. Then
we click on Insert Table command ... and in the dialog box we specify number of
columns (Number of columns and rows (Number of columns rows
, which we
want to use.
3. Format Table
To display commands and format a table, the cursor must be inside the table. Then, the toolbar will display two more tabs on the ribbon with options a) table Design and B) Layout. From these two tabs can be made most of the formatting, relating to a table.
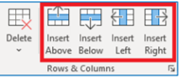
1. Insert row and column: from the layout tab and the Command Group Rows and Columns we can insert a new line above or below the selected line. Accordingly, we can introduce a new one column right or left of the column we have selected.
![]()
2. Delete cells, row, column or whole table: from layout tab and command group Rows and Columns by selecting delete, we can delete the cell, row, column where it is located inside our runner. From here we can also delete the entire table.
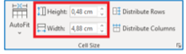
3. Change the row height and Column Width of the table: from the layout tab and cell Size command group we can adjust the row height and Column Width we have selected.
4. Formatting the content of the table: formatting the content of a table is done in exactly the same way, as in the rest of the text that is outside the table, from the Home tab and the font command group.
5. Contours and shadings: the process here too is the same as that done in the text, located outside the table. First, we select the cells on which we would like to apply shading or contour. Then, from the Home tab and the Paragraph group, we select the border icon if we want to apply a border, and the shadow icon if we want to apply a shadow.
6. Merge cells: we select the cells we want to merge and from the Layout tab and the Merge Cells group we select the Merge Cells icon.

7. Split cells: we select the cells we want to separate, and from the layout tab and the Merge group we select the split Cells icon.
8. Automatic change in the style of the table: we select the table we want to from the table Design tab and The Table Styles group we select one of the icons with the ready formats, which we want to use.

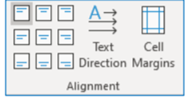
9. Changing the alignment and direction of text within a cell: We select the cells we want to change their alignment and then from the layout tab and the align command group we select the alignment that we wish. From this tab and with text option direction we can change the direction of text inside the cells.
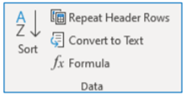
4. Sort items in one column of the table
We select the column of the table that we want to sort, and then, from the layout tab and the data command group, we select the Sort. From the window that appears we can specify the content of if it is plain text, numbers or dates and if we want ascending or descending classification.
EXERCISES:
1. Go to Word, create a new document and insert a table.